
When taking photos for my Artfire items I kept running into dilemmas. My house is too dark. The window placement doesn't provide good lighting. I also would barely be home or have time to be outside during the best natural lighting. When I could be outside it was raining or it was starting to get darker sooner. Natural lighting was just fighting me. I came to a conclusion: Time to make a light tent/box.
I googled around and came up with this link: How to make an inexpensive light tent. I really liked it's instructions so I decided this was the way to go. I ended up buying a box since the ones laying around weren't the right size for me. It only cost 88 cents so no biggie. I also picked up some white fabric and masking tape. Once I had all this I went to work.
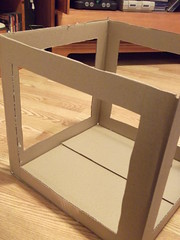
First I had to measure the margins and cut all the sides and the top out.
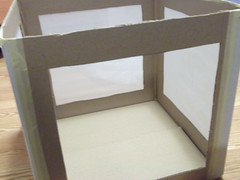
The next step was to cover the sides and top with fabric. I used masking tape like they suggested in case I want to change it up in the future.
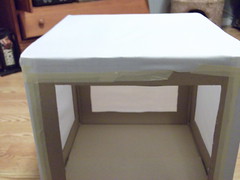
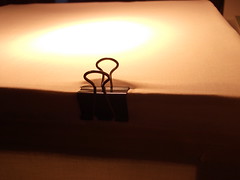
Now it says to put a pice of paper or posterboard in for the background. I chose to use fabric. In order to make it changable I used binder clips to hold the fabric up. I put two slits in the top, one for each clip.
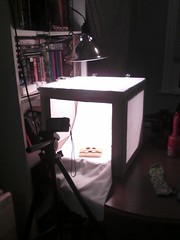
So here is my temporary setup. It worked out alright but the lighting is kind of yellowed. I know editing will help but I would like to get a better bulb anyway. I think it will cost me around $10 in total. Not a bad deal at all. So now to edit and list more items. :)
No comments:
Post a Comment